So, if you play on instagram like I do, you will see that June is in full swing. You can tell by the pie that literally everyone is making: the strawberry rhubarb pie.
I remember the first time I tried this pie as a kid. “How can something be SO delicious,” I thought to myself. I had no idea what rhubarb was, since I was a city girl and my mom made apple and blueberry pies only. When I tried to recreate it later in life, I was sadly disappointed by the lack of rhubarb in my local supermarket in the offseason.
Fast foward to my adult life. I pretty much understand cooking with the seasons and I even have my own rhubarb plant in the backyard. So today I challenged myself to make the perfect strawberry rhubarb pie with a lattice top.
I used a basic recipe for the filling (adapted from https://sallysbakingaddiction.com/strawberry-rhubarb-pie/
- 1 lb strawberries, sliced
- 3 cups rhubarb, sliced into 1/2 pieces
- 1/3 cup light brown sugar
- 1/3 cup white sugar
- 1/4 tsp pink salt
- 1/4 cup cornstarch
- 1/4 tsp cinnamon
- 1 tablespoon orange juice
I mixed my filling and let it sit while I rolled out my pie dough. That way the strawberries release a lot of their juices. I do not put the liquid in the pie crust. I used a slotted spoon to only transfer the fruit to my pie dough. That way it is not soggy.
I used my favorite all butter pie crust which you can find here: https://www.seriouseats.com/recipes/2016/06/old-fashioned-flaky-pie-dough-recipe.html
A few tips for pie dough:
- Turn the ac on
- When making pie crust, keep everything COLD. Those intact pieces of butter in the dough will melt and create flaky layers.
- When rolling it out, use lots of flour.
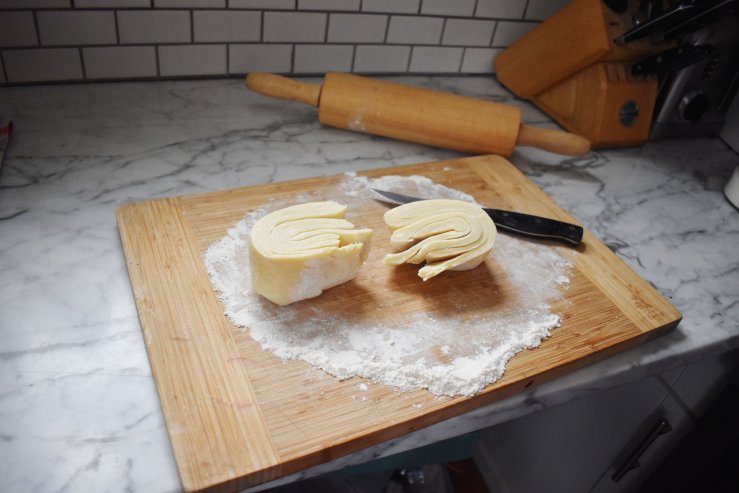
There is a cross section from my wonderful flaky dough. I like this recipe because you roll it out then fold it up again and end up with flaky layers as shown above.
I rolled out each piece and lined my pretty pie plate.
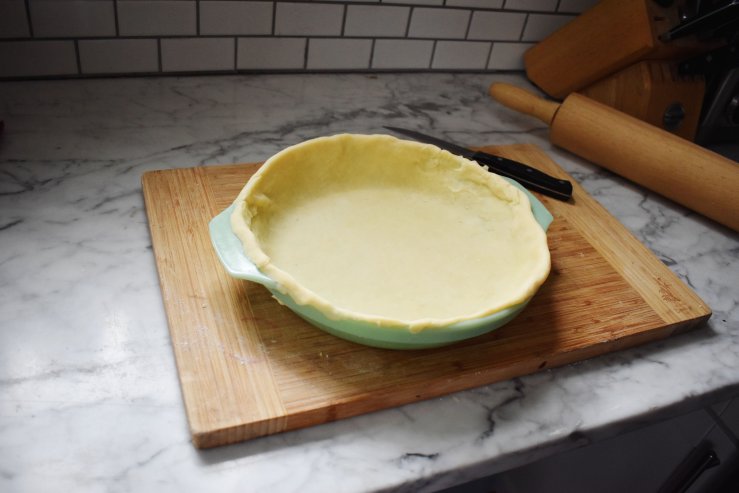
Then I filled my pie crust, leaving behind all the liquid to avoid a soggy bottom. I then dotted my pie filling with tiny pats of butter.
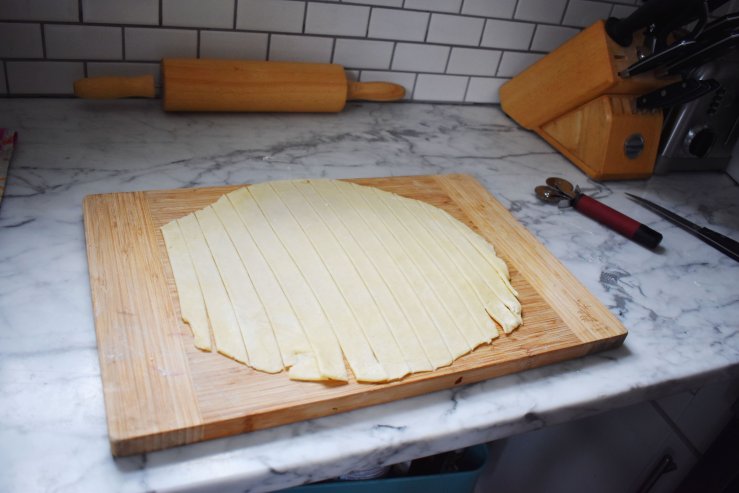
Now comes the tough part. I rolled out my second pie crust and cut it into about 3/4 inch slices. A little sloppy but it will do.
Now I took six strips, of course using the longest ones for the middle and laid them parallel to one another across the pie.
I folded every other strip back by half. Then I layed one long strip perpindicular to the others, and then replaced the ones I had folded back. I forgot to take pictures.
Then I folded back the strips that were UNDER the perpindicular strip and laid one across those. See below. I had to find pictures of the process…
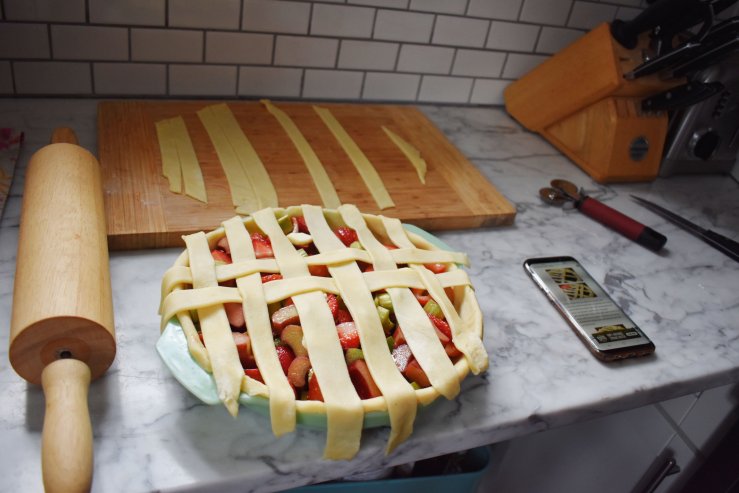
I contined this process, working from the middle out, until it looked pretty perfect.
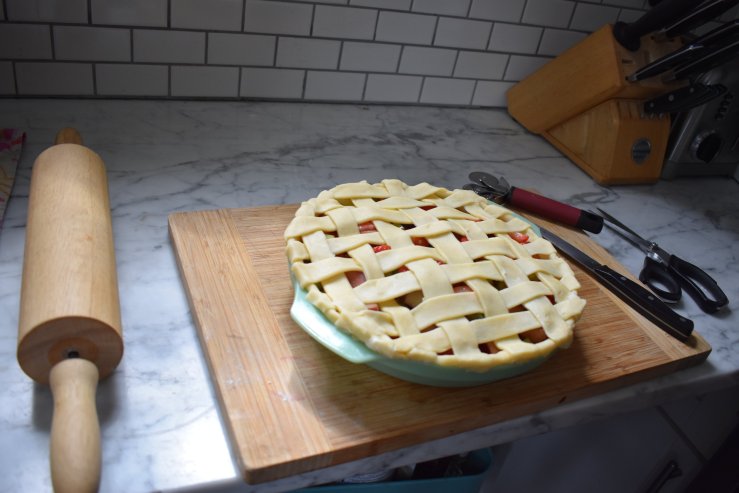
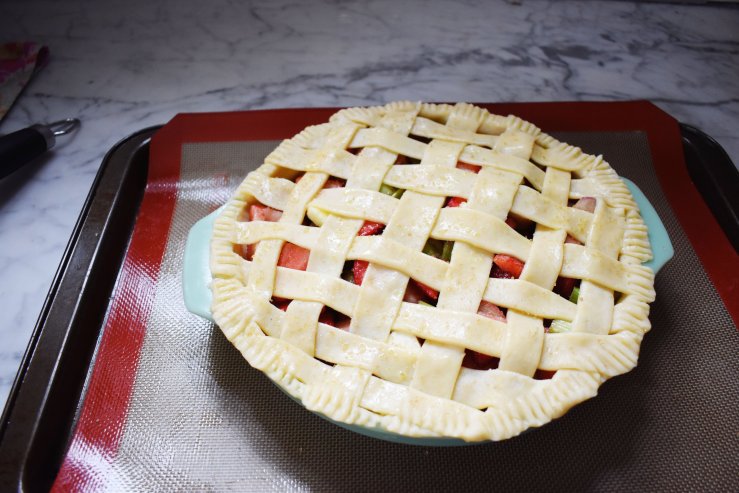
I cut back the extra dough and shared it with the dog. I used a fork to crimp the edges, then brushed some egg wash over the top. For those who don’t know, an egg wash is an egg lightly beaten with 1 tablespoon of cream or milk. Then I sprinkled coarse sugar over the top.
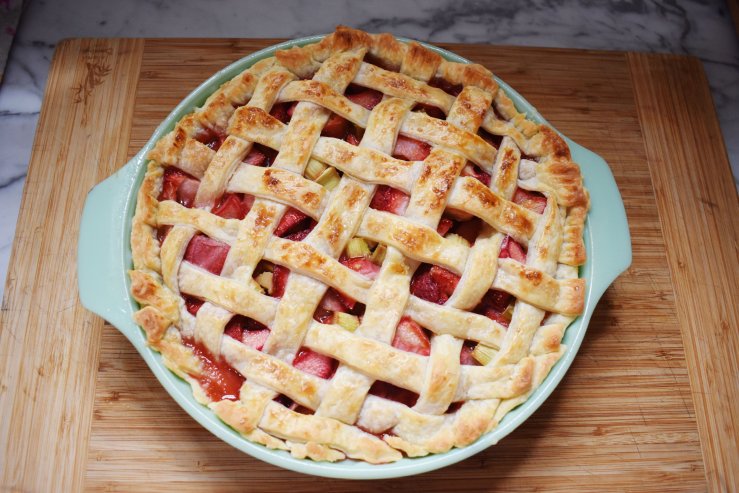
I then put it into a 400 degree oven on the bottom shelf for 20 minutes. After 20 minutes, I covered the edges with my pie shield, decreased the heat to 350 degrees, and baked for another 25 minutes.
When the top is golden brown and the filling is bubbly the pie is done. However, the hardest part is waiting for the filling to set. This takes at least 3 hours or overnight. But it is worth it…
Are you making this pie this year?
